应该算是第一篇比较正式的blog吧,前几天把bolg搭起来了,今天又实现了持续集成,可以实现一个仓库保存blogs和网站页面,并在更新的时候自动构建+部署网站。这种构建方式最大的好处是免费+资料掌握+自动部署,那下面就来介绍一下怎么实现。
使用流程
在多台设备上可clone一个仓库,使用hugo或手动在content/post下新建md文件攥写文章,完成后git提交并推送远程仓库,远程仓库会自动构建网站,用户等一会就可以看到网站更新了。
编写环境只要有git即可完成编写+部署流程(当然添加了hugo在创建文章时会更方便啦,而且可以本地看到效果)。
搭建逻辑
博客可以是静态的,也可以是动态的。静态的就是一堆由HTML和CSS、JS组成的文件直接被浏览器访问,没有后台程序提供业务支持,好处是不吃资源,访问只受网络带宽限制,坏处是没法做业务处理了;
动态指的是由前端+后端组合支持的网站,好处是可以做自由的业务和管理,坏处是部署麻烦,对资源需求大,并发访问受到服务器性能限制。
为了便于维护,本文搭建的是静态网站。
采用技术是
- Markdown:文章编写语法
- Hugo:静态网站编译工具
- GitHub Page:网页托管
- GitHub Action:自动构建服务
Hugo的使用逻辑是,我们编写markdown格式文章,并附加某种格式的数据,写好后交给Hugo工具“构建”生成静态的HTML和CSS、JS组成的文件,这些文件统一放在public文件夹下,此时部署public就可以看到你的网站了。
其中一个缺点是每次需要Hugo的环境来“构建”,并需要维护两套代码:文章源代码和网站代码
当结合Github Action时,可以把这个构建过程交给云端处理。每次主分支推送时都会触发这个“构建”,同时把public下的文件推送到gh-page分支,利用Github Page挂载你的网站,这样网站就更新好并可以浏览了。
搭建步骤
1、安装hugo
Hugo没有一键安装包,可以使用包管理工具安装,MacOS用brew,Windows用chocolatey。各个系统安装看这
1
2
3
4
5
| MacOS:
brew install hugo
Windows:
choco install hugo -confirm
|
安装完成后使用hugo new site quickstart创建quickstart文件夹作为网站主目录。
进入目录,使用hugo new posts/my-first-post.md创建一个新的文章。然后把draft: true删除或者改为draft: false,这样就公开文章咯。
使用hugo server可以在本地部署网站,访问 http://localhost:1313/ 就可以看到网站咯!
更多Hugo使用教程参考这个。
2、添加Github Action
官方文档里有说明,这里概述一下:
- 在你的项目下创建
.github/workflows/gh-pages.yml这个路径的文件 - 复制这一段进去,注意下面两个
main的地方,如果你用master,则改成master
 1
 2
 3
 4
 5
 6
 7
 8
 9
10
11
12
13
14
15
16
17
18
19
20
21
22
23
24
25
26
27
28
29
30
31
32
| name: github pages
on:
push:
branches:
- main # Set a branch to deploy
pull_request:
jobs:
deploy:
runs-on: ubuntu-20.04
steps:
- uses: actions/checkout@v2
with:
submodules: true # Fetch Hugo themes (true OR recursive)
fetch-depth: 0 # Fetch all history for .GitInfo and .Lastmod
- name: Setup Hugo
uses: peaceiris/actions-hugo@v2
with:
hugo-version: 'latest'
# extended: true
- name: Build
run: hugo --minify
- name: Deploy
uses: peaceiris/actions-gh-pages@v3
if: github.ref == 'refs/heads/main'
with:
github_token: ${{ secrets.GITHUB_TOKEN }}
publish_dir: ./public
|
3、添加仓库
初始化好网站后,使用git初始化仓库,并提交。
1
2
3
| git init
git add .
git commit -m "init"
|
在github上创建新仓库,这个仓库名称可以是用户名.github.io,或者别的。最后访问地址是用户名.github.io或者用户名.github.io/仓库名.不需要readme。然后本地仓库添加远程仓库,并推送。
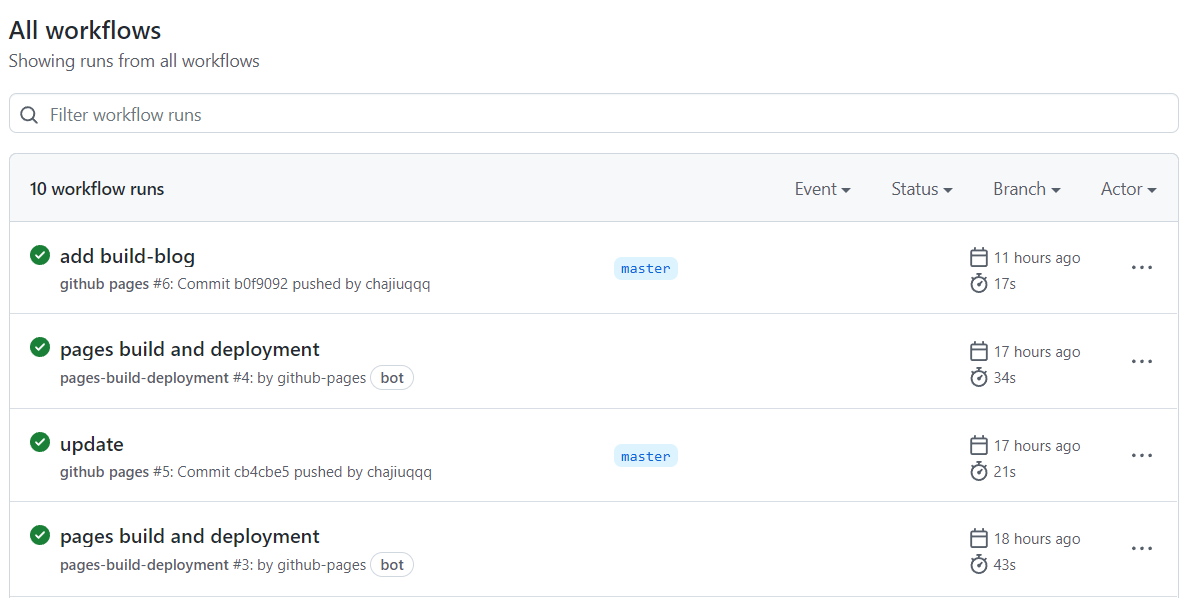
推送成功后,Action会自动build网站并推送到gh-pages分支。因此我们使用一个仓库的不同分支来管理文章源代码和网站代码。
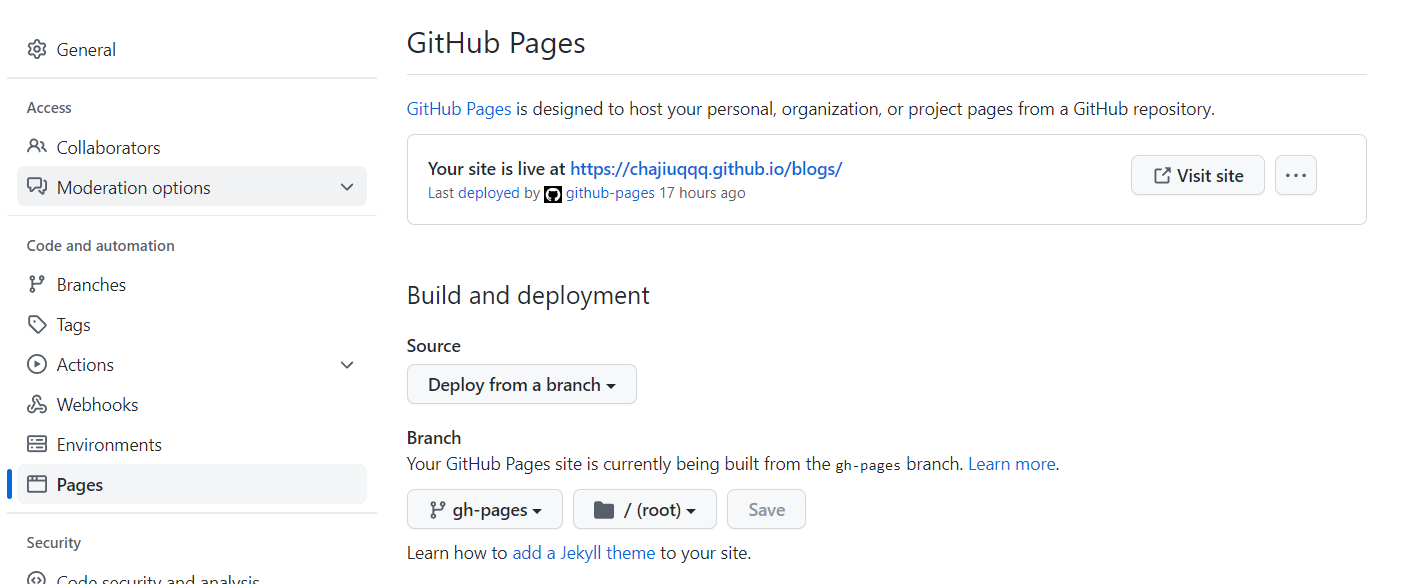
3、设置GitHub Page
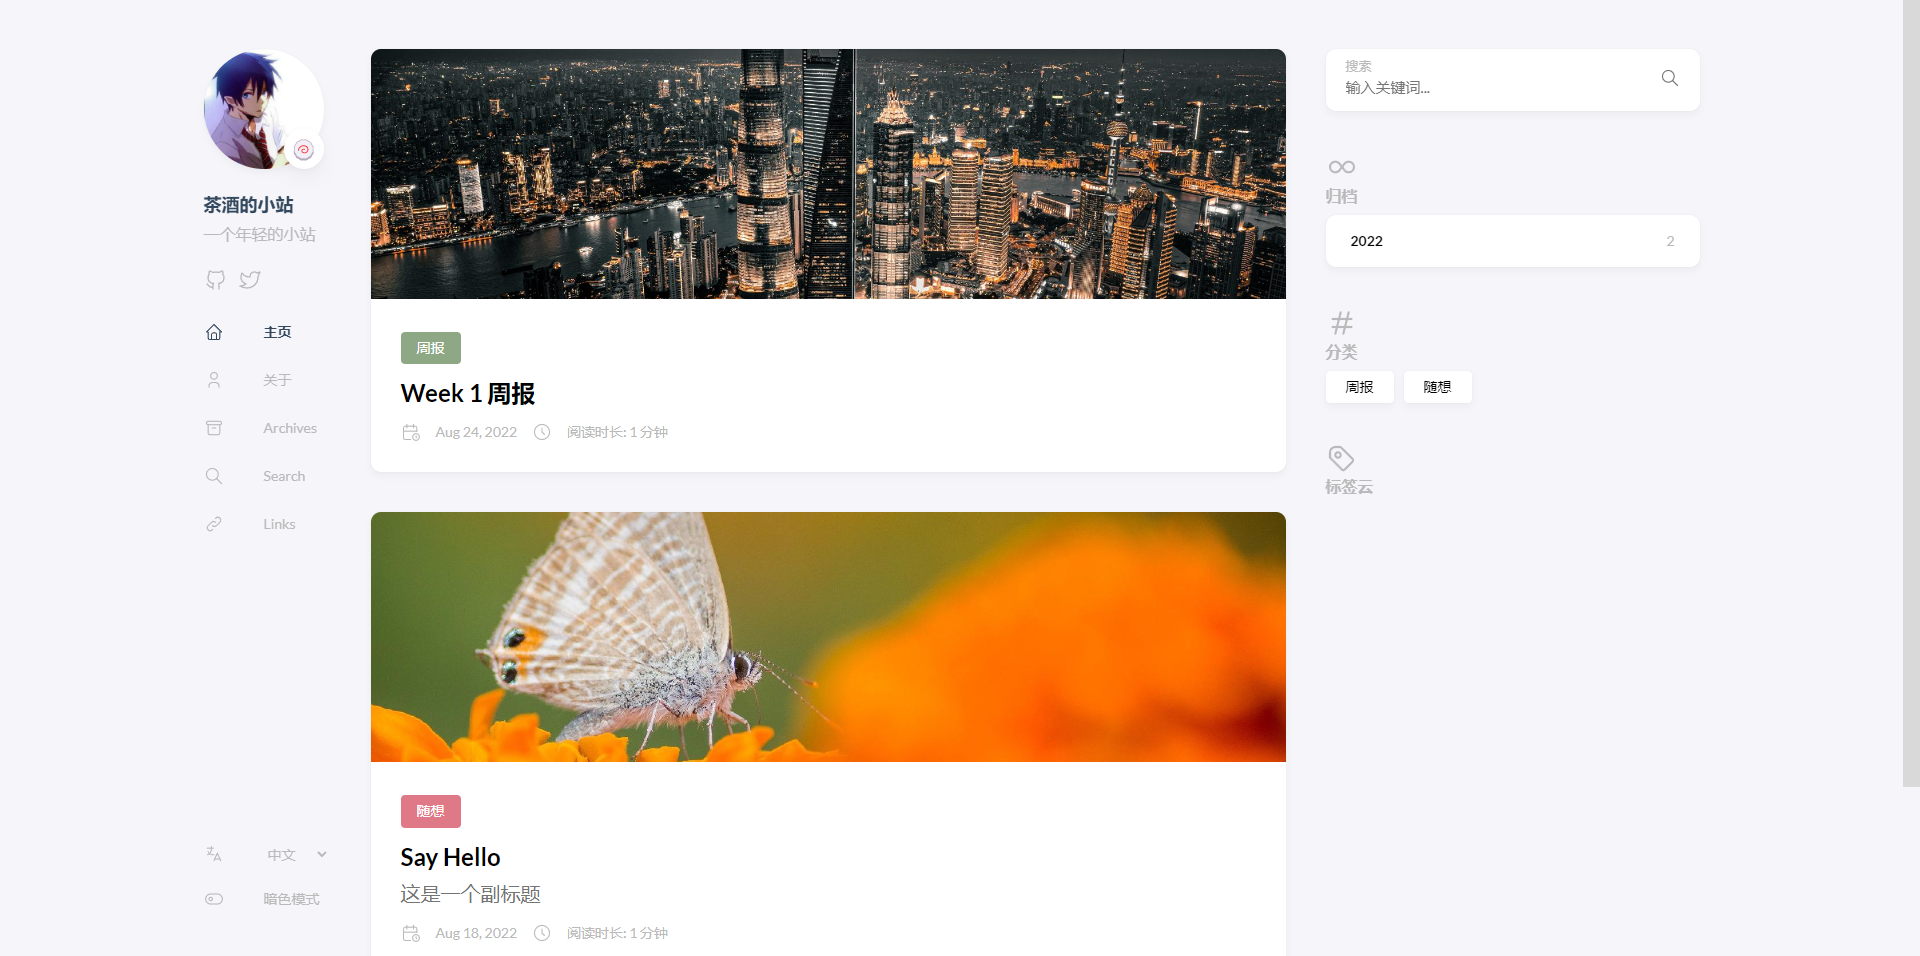
在项目设置里选择Pages,初次构建需要指定哪个分支的代码用作Page,选择gh-pages分支并保存即可,上方会给出可以访问的地址。我的仓库名称是blogs,因此地址是 https://chajiuqqq.github.io/blogs/ ,试试访问你的网站,应该可以看到第一篇文章咯。
如果看得到网站,但是文章点不进去,请修改config.yaml,将baseurl换成你的网站地址即可!这是线上部署网站必要的步骤!
如:
1
| baseurl: https://chajiuqqq.github.io/blogs/
|
如果没有config.yaml咋办?把原来的config.xxx删了,自己创建config.yaml即可!hugo会识别到这个配置文件哦!
5、再发布一篇新文章
是不是很方便呢
最后
hugo提供了很多好看的主题,参考主题指南进行更换哦,比如我使用的hugo-theme-stack
配置方法就是在网站目录下添加这个库
1
| git submodule add https://github.com/CaiJimmy/hugo-theme-stack themes/hugo-theme-stack
|
并修改config.yaml,这个可以直接复制hugo-theme-stack下examplesite的config.yaml再修改哦。最主要的就是baseurl换成你的网站地址即可!下面贴上我的配置.
The End
  1
  2
  3
  4
  5
  6
  7
  8
  9
 10
 11
 12
 13
 14
 15
 16
 17
 18
 19
 20
 21
 22
 23
 24
 25
 26
 27
 28
 29
 30
 31
 32
 33
 34
 35
 36
 37
 38
 39
 40
 41
 42
 43
 44
 45
 46
 47
 48
 49
 50
 51
 52
 53
 54
 55
 56
 57
 58
 59
 60
 61
 62
 63
 64
 65
 66
 67
 68
 69
 70
 71
 72
 73
 74
 75
 76
 77
 78
 79
 80
 81
 82
 83
 84
 85
 86
 87
 88
 89
 90
 91
 92
 93
 94
 95
 96
 97
 98
 99
100
101
102
103
104
105
106
107
108
109
110
111
112
113
114
115
116
117
118
119
120
121
122
123
124
125
126
127
128
129
130
131
132
133
134
135
136
137
138
139
140
141
142
143
144
145
146
147
148
149
150
151
152
153
154
155
156
157
158
159
160
161
162
163
164
165
166
167
168
169
170
171
172
173
174
175
176
177
178
179
180
181
182
183
184
185
186
187
188
189
190
191
192
193
194
195
196
197
198
199
200
201
202
203
204
205
206
207
208
209
210
211
212
213
214
215
216
217
218
219
220
221
222
223
224
225
226
227
228
229
230
231
232
233
234
235
236
| baseurl: https://chajiuqqq.github.io/blogs/
languageCode: en-us
theme: hugo-theme-stack
paginate: 5
title: 茶酒的小站
languages:
en:
languageName: English
title: Chajiu's blog
weight: 1
zh-cn:
languageName: 中文
title: 茶酒的小站
weight: 2
ar:
languageName: عربي
languagedirection: rtl
title: موقع تجريبي
weight: 3
# Change it to your Disqus shortname before using
disqusShortname: hugo-theme-stack
# GA Tracking ID
googleAnalytics:
# Theme i18n support
# Available values: ar, bn, ca, de, el, en, es, fr, hu, id, it, ja, ko, nl, pt-br, th, uk, zh-cn, zh-hk, zh-tw
DefaultContentLanguage: zh-cn
# Set hasCJKLanguage to true if DefaultContentLanguage is in [zh-cn ja ko]
# This will make .Summary and .WordCount behave correctly for CJK languages.
hasCJKLanguage: true
permalinks:
post: /p/:slug/
page: /:slug/
params:
mainSections:
- post
featuredImageField: image
rssFullContent: true
favicon:
footer:
since: 2020
customText:
dateFormat:
published: Jan 02, 2006
lastUpdated: Jan 02, 2006 15:04 MST
sidebar:
emoji: 🍥
subtitle: 一个年轻的小站
avatar:
enabled: true
local: true
src: img/avatar.jpeg
article:
math: false
toc: true
readingTime: true
license:
enabled: true
default: Licensed under CC BY-NC-SA 4.0
comments:
enabled: true
provider: disqus
disqusjs:
shortname:
apiUrl:
apiKey:
admin:
adminLabel:
utterances:
repo:
issueTerm: pathname
label:
remark42:
host:
site:
locale:
vssue:
platform:
owner:
repo:
clientId:
clientSecret:
autoCreateIssue: false
# Waline client configuration see: https://waline.js.org/en/reference/component.html
waline:
serverURL:
lang:
pageview:
emoji:
- https://unpkg.com/@waline/emojis@1.0.1/weibo
requiredMeta:
- name
- email
- url
locale:
admin: Admin
placeholder:
twikoo:
envId:
region:
path:
lang:
# See https://cactus.chat/docs/reference/web-client/#configuration for description of the various options
cactus:
defaultHomeserverUrl: "https://matrix.cactus.chat:8448"
serverName: "cactus.chat"
siteName: "" # You must insert a unique identifier here matching the one you registered (See https://cactus.chat/docs/getting-started/quick-start/#register-your-site)
giscus:
repo:
repoID:
category:
categoryID:
mapping:
lightTheme:
darkTheme:
reactionsEnabled: 1
emitMetadata: 0
gitalk:
owner:
admin:
repo:
clientID:
clientSecret:
cusdis:
host:
id:
widgets:
homepage:
- type: search
- type: archives
params:
limit: 5
- type: categories
params:
limit: 10
- type: tag-cloud
params:
limit: 10
page:
- type: toc
opengraph:
twitter:
# Your Twitter username
site:
# Available values: summary, summary_large_image
card: summary_large_image
defaultImage:
opengraph:
enabled: false
local: false
src:
colorScheme:
# Display toggle
toggle: true
# Available values: auto, light, dark
default: auto
imageProcessing:
cover:
enabled: true
content:
enabled: true
### Custom menu
### See https://docs.stack.jimmycai.com/configuration/custom-menu.html
### To remove about, archive and search page menu item, remove `menu` field from their FrontMatter
menu:
main: []
social:
- identifier: github
name: GitHub
url: https://github.com/chajiuqqq
params:
icon: brand-github
- identifier: twitter
name: Twitter
url: https://twitter.com
params:
icon: brand-twitter
related:
includeNewer: true
threshold: 60
toLower: false
indices:
- name: tags
weight: 100
- name: categories
weight: 200
markup:
goldmark:
renderer:
## Set to true if you have HTML content inside Markdown
unsafe: false
tableOfContents:
endLevel: 4
ordered: true
startLevel: 2
highlight:
noClasses: false
codeFences: true
guessSyntax: true
lineNoStart: 1
lineNos: true
lineNumbersInTable: true
tabWidth: 4
|